
 It all started because I had a length of 10mm copper pipe left over from the
solar water heater. We did a toilet usage survey and found that we flushed
the toilet about 4 times a day: 8 litres each time: 224 litres/week
or around £37/year.
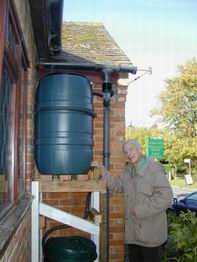
A £33 garden water butt holds 220 litres, enough for a week's use. The drainpipe
outside the bathroom had a 22m2 catchment area. The monthly rainfall for
Oxford is roughly constant at 25"/year or 1.2cm/week. That is 270 litres/week for our catchment
area. If the rainfull was uniform and if we collected it all, we should be self sufficient. Plenty of ifs! We should need a mains water backup.
It all started because I had a length of 10mm copper pipe left over from the
solar water heater. We did a toilet usage survey and found that we flushed
the toilet about 4 times a day: 8 litres each time: 224 litres/week
or around £37/year.
A £33 garden water butt holds 220 litres, enough for a week's use. The drainpipe
outside the bathroom had a 22m2 catchment area. The monthly rainfall for
Oxford is roughly constant at 25"/year or 1.2cm/week. That is 270 litres/week for our catchment
area. If the rainfull was uniform and if we collected it all, we should be self sufficient. Plenty of ifs! We should need a mains water backup.
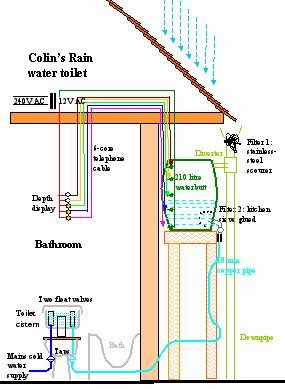
A downpipe was conveniently near the bathroom, but if pumps were to be avoided,
the rain butt needed to
be elevated well above the cistern height. James' new garage doors had just been installed
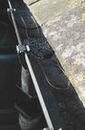
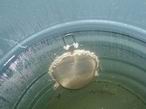
and the old frame was ideal. Filters seemed a good idea, so I used first a stainless
steel pan scourer placed in the inlet to the rainwater downpipe. Secondly I used a
kitchen seive, glued over the tap inlet.

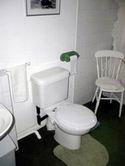 The 10 mm diameter copper pipe went through the bathroom wall, under the bath,
then along the bathroom wall under the carpet till it surfaced below the cistern.
I insulated it with exposed bits of pipe as the very cold water from outside tended to
cause condensation on the pipes.
I needed to buy two slim ball valves, one for the mains water and one for the rain water
each with a control tap. They fitted into either side of the cistern and worked well with
both water pressures. At the time of writing after a month's use we have not had to
try the mains water. It fills slowly but silently.
The 10 mm diameter copper pipe went through the bathroom wall, under the bath,
then along the bathroom wall under the carpet till it surfaced below the cistern.
I insulated it with exposed bits of pipe as the very cold water from outside tended to
cause condensation on the pipes.
I needed to buy two slim ball valves, one for the mains water and one for the rain water
each with a control tap. They fitted into either side of the cistern and worked well with
both water pressures. At the time of writing after a month's use we have not had to
try the mains water. It fills slowly but silently.
A problem soon encountered was the difficulty of knowing the level of water in the
butt. I had to fetch the step-ladder, climb up, open the butt cover and peer in.
I devised an electronic level meter.
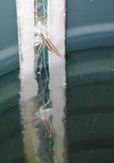 When I connected up a LED in series with a 12V AC source and made the circuit through the
rainwater I had not expected to see anything, but it did light up dimmly. I made a set of
5 pairs of contacts from screwfix screws glued into a plastic cover which dipped into the butt.
By chance I had a long length of 6-core telephone cable which was easy to thread into the
loft from above the butt. From there it went to the transformer and down again into the
airing cupboard which was next to the bathroom. The picture shows the 5 LEDs mounted into
a tile. It all works just fine.
When I connected up a LED in series with a 12V AC source and made the circuit through the
rainwater I had not expected to see anything, but it did light up dimmly. I made a set of
5 pairs of contacts from screwfix screws glued into a plastic cover which dipped into the butt.
By chance I had a long length of 6-core telephone cable which was easy to thread into the
loft from above the butt. From there it went to the transformer and down again into the
airing cupboard which was next to the bathroom. The picture shows the 5 LEDs mounted into
a tile. It all works just fine.
Copyright 2008 Colin Windsor : Last updated 19/11/2008