
We had an old car battery that appeared to work OK, so that it was sensible to design
everything for 12 volts. Six nominally 2 volt LEDs soldered in series into a little coronet
would work nicely passing 20 milliamps or 0.24 watts. The coronet could be screwed to a
double terminal block which could in turn be screwed to the two little wires going up to the
 filament in a standard bayonet light fitting. The little coronet also fitted into
little spice jars which we had. The top could be glued to the ceiling and to a connector block
in the loft. The illumination spread to our scullary, kitchen, bathroom
and my office. Even 12 coronets would only use 2.8 watts.
filament in a standard bayonet light fitting. The little coronet also fitted into
little spice jars which we had. The top could be glued to the ceiling and to a connector block
in the loft. The illumination spread to our scullary, kitchen, bathroom
and my office. Even 12 coronets would only use 2.8 watts.
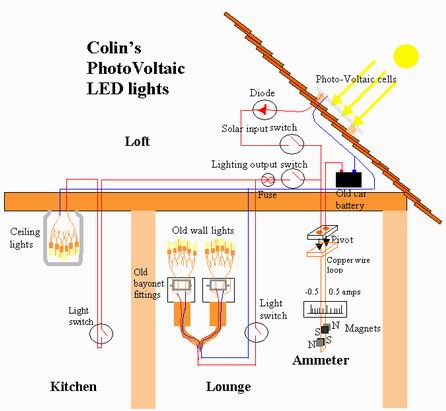
Our old car battery was 60 ampere hours or 720 watt hours. It would keep the lights on for 64 days at 2.8 watts for 4 hours a day or 11.2 watt hours/day. I originally fixed up the Morris Minor trickle charger to do the charging. But how much nicer to have a small PV panel! I bought an 8 watt 12 V set of cells designed for car battery charging for £49 from CPS-solar. It nominally produced an ample 56 watt hours per day. But that was averaged over the year. In December the sunlight, when it shines, is only 19% of the average and it only shines 40% as often so we get only 4 watt hours per day. This is still just enough. There will be overkill in the summer.
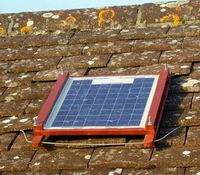
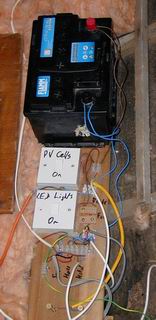
The panel was easily fixed on to the tiles near the water-heater panels. The circuitry is shown. A diode in series with the panel stops the battery discharging through the panel. An input switch is there for times when overcharging could occur. A fuse on the battery output guards against accidental shorts. The toggle switch in the lounge replaced the previous mains dimmer switch. The wiring for all the lights was already on a single circuit, although it took quite a bit of tricky detective work to decouple them from the other lights which shared the same switch casing.
The LEDs were again from RS components and were a pleasant bright yellow colour. They cost 17 pence each.
I felt thwarted that, when it was all working, you had no idea that is was indeed working.
To measure the current generated or used, one had to climb into the loft and attach a multimeter.
I only did it once!
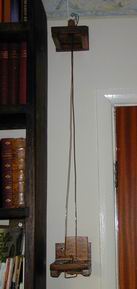 I devised a simple ammeter that would show both current generation(+) and use(-). I found some magnets
and some thick copper wire and made a simple loop which would swing sideways
on a pivot according to the current.
I devised a simple ammeter that would show both current generation(+) and use(-). I found some magnets
and some thick copper wire and made a simple loop which would swing sideways
on a pivot according to the current.
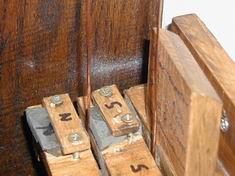 It was sensitive enough to show the 20 milliamp current from a single light, and non-linear enough that it could
show the half-amp expected on a summer day. It was easily calibrated against my multimeter.
It now hangs on the lounge wall and provides a little electromagnetic education for the grandchildren.
It was sensitive enough to show the 20 milliamp current from a single light, and non-linear enough that it could
show the half-amp expected on a summer day. It was easily calibrated against my multimeter.
It now hangs on the lounge wall and provides a little electromagnetic education for the grandchildren.
The economics are interesting. The expenditure was £61. Over the year the solar electricity generated is only about £3/year with a 16 year payback time. However if one of the bright mains lights are not used for 4 hours/day, the payback is £52/year and the payback time around a year.
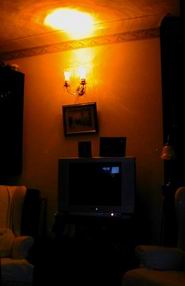
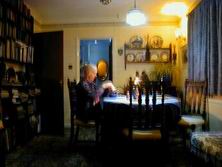
It all gives a delightful glow to our lounge while we are listening to radio, watching TV,
or just talking. Supplemented by the glow from our gas fire it is perfect for massage and whatever!
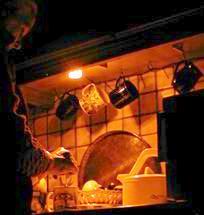
We can go to the kitchen and make a cup of tea without switches! The light is
mounted just over the working surface with the kettle. We can even visit the loo!
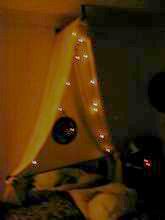
In our bedroom we have long had a muslin canopy over the bed head. It now has two strings of
LEDs giving us a lovely yellow glow!
Update in February 09
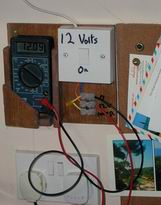
I fitted up a 12 Volt test station in our scullary. It has my multimeter mounted so that it can
easily measure the battery voltage. The spare table could turn into a nice bench for soldering up
 and testing 12 volt applications. The voltage had been rising steadily from 11.7 to 11.9 V after an
evening of running. It was clear that the
old battery was coping fine even in the winter. I bought more LEDs, some bright white ones that ran on
3 volts so four in a series chain would run from the battery.
and testing 12 volt applications. The voltage had been rising steadily from 11.7 to 11.9 V after an
evening of running. It was clear that the
old battery was coping fine even in the winter. I bought more LEDs, some bright white ones that ran on
3 volts so four in a series chain would run from the battery.
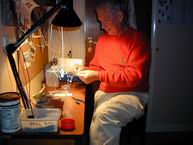
The first project was a spider lamp for reading. It had six chains of four LEDs soldered up
with thin stiff insulated wires so it formed a web of light. Its not like an incandescent bulb but
it is OK for reading.
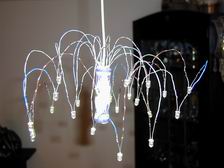

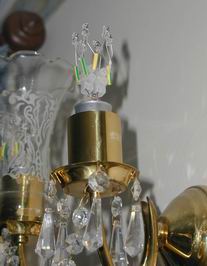
Its companion light with the same setup of 24 white LEDs has been mounted in the old chandelier
we have had for many years which is mounted over our dining room table. I wished to leave the old
bulb in place so the set of LED lights is mounted in addition with its own pull switch just next to
the old one. It was constructed from two rings of stiff copper wire one at 12 V and one at zero with
the six strings of four LEDs soldered in between the rings. It was made mostly from bare copper
later covered with sticky insultating plastic. It hardly shows in daylight. In the night-time its
bright glow is perfect for dinner parties.

On the web, I located cheaper brighter LED's made in China and from
www.besthongkong.com.
I bought 100 ultra-bright 20,000 millicandle 5mm diameter LEDs for $41 (~£30). They have 20o
angular spread so that they can be directed in any desired direction.
Their rated current is 20 milliamps at 3.2 to 3.4 volts. The site helpfully suggested that they be run with a series
resistor to optimise the voltage. Three LEDs at 3.3V will take 9.9 volts and a 100 ohm resistor at 0.02 amps will take 2V so
that the 12V is nicely obtained by three LEDs in series along with a 100 ohm resistor.
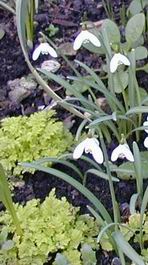
It was snowdrop time and I noticed that the snowdrops in our garden tended to point down and to one side of their group.
It was an ideal shape for a reading light. So the white LED was at the centre of the flower. The leads were soldered on to
this wires which were covered in green plastic tape. Three petals were cut out of plastic and stuck on symetrically with more
green tape. Lastly the flower was bent over to the required angle. I made 15 snowdrops in 5 sets of 3 with resistors.
sheet for each flower
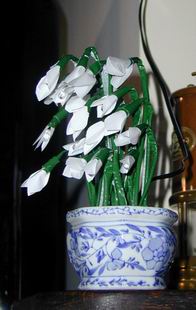
The "snowlight" is really bright, and great for reading. It was possible and easy to "tune" the directions of each snowdrop
so that its light on the page was bright and even. It remains quite directional so that it must be appropriately placed
when settling down with a book.

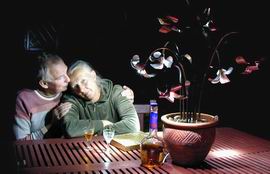
A more ambitious project was an outdoor light to light our new patio table at warm evening dinner
parties. The idea for the design came from a visit to the Root One Garden Centre where they were
selling lily tubours. The lily flower has 6 large petals arranged in two layers of three petals. At their
centre would normally be the stamens, but I would put a little triplet of super-bright LEDs. I had in mind
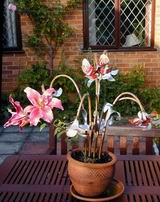
 7 separate flowers so there would be 42 petals. The "stalks" could be made from old 1 cm diameter
copper pipe left over from the solar water heating which could easily be bent so that the
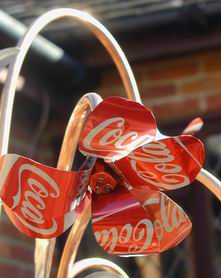
lights would shine down onto our plates. I wanted to use copper sheet for the petals
but it was not easy to get free and expensive to buy on the internet. I decided to use iconic traditional
coke can aluminium whose natural curvature would add strength to the petals. It was a pleasant hunt looking
for the 12 or so cans that I needed. Out on my bicycle, I would scan the hedgerows and ditches and
there they were in relative profusion. Each ride seemed to give me several in my basket and also
made the countryside a little tidier. I would take them home and cut them into petals.
This was the difficult bit. The coke can is marvelously strong! I had to hammer a cold chisel into the
edge to make a hole, then use garden sissors to cut out the curved sheet. I would shape the sheet
from each can into four petals. The copper pipes lead into a nice old ceramic pot which would appear
to be full of soil. In fact the pipes went into a wooden block within an old Christmas pudding basin
whose water-proof lid kept the electrics dry.
7 separate flowers so there would be 42 petals. The "stalks" could be made from old 1 cm diameter
copper pipe left over from the solar water heating which could easily be bent so that the
lights would shine down onto our plates. I wanted to use copper sheet for the petals
but it was not easy to get free and expensive to buy on the internet. I decided to use iconic traditional
coke can aluminium whose natural curvature would add strength to the petals. It was a pleasant hunt looking
for the 12 or so cans that I needed. Out on my bicycle, I would scan the hedgerows and ditches and
there they were in relative profusion. Each ride seemed to give me several in my basket and also
made the countryside a little tidier. I would take them home and cut them into petals.
This was the difficult bit. The coke can is marvelously strong! I had to hammer a cold chisel into the
edge to make a hole, then use garden sissors to cut out the curved sheet. I would shape the sheet
from each can into four petals. The copper pipes lead into a nice old ceramic pot which would appear
to be full of soil. In fact the pipes went into a wooden block within an old Christmas pudding basin
whose water-proof lid kept the electrics dry.
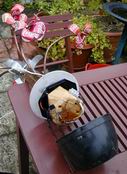
So in the Spring of 2009 the lamp was completed and the pot topped up with good compost
in which were planted the lily tubours. They soon grew up but took most of the summer to flower.
The first picture shows the real and artificial flowers together.
The last picture shows the light in use. Would that we had had more warm summer evenings!
Copyright 2008 Colin Windsor : Last updated 31/12/2009