
Last Christmas, my
first choice for a present was a bass recorder, but a nice wooden one seemed
way outside our budget. The second choice was an electric router. These are
like fast power drills with a special bit that can cut sideways as well as
down. It set my mind working! With a bit of jigging and poking it is possible
to cut a half inch rectangular grove as long as a bass recorder, as deep as its
bore, and even at an angle to the surface of the wood! I spent some
mathematical hours exploring the options for the bore cross-section shown in
figure 1. All the shapes shown have exactly the same cross-sectional area.
Figure 1: A series of bore sections with the
same area. The circular area is gradually extended, and topped by a flat
"lid"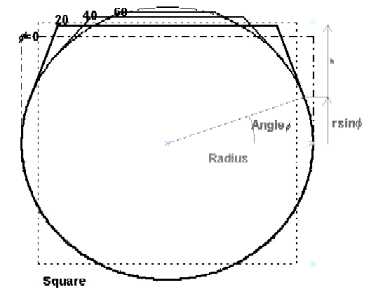
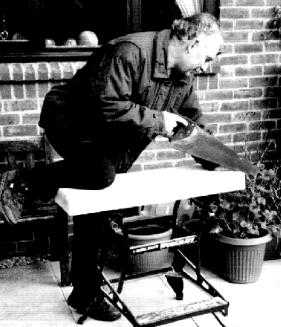
Figure 2: The first cut!
Lying in my garage was a lovely slab of ash, originally given to me for wood carving but still awaiting inspiration. It was 75 mm thick and looked long enough for a bass recorder. I played the three wooden bass recorders in our little group that meets at Wantage on Wednesday nights. I borrowed them, (thank you Kathleen, Mary and Maggy) and measured everything I could. They were surprisingly different, and different too from the "official" Dolmetsch inter-key-hole distances you can read on their website (www.dolmetsch.com). The bores were all approximately conical, with the ratio of the head bore to the end bore being about 1.5. I chose Kathleen's as it was the shorter - fipple to tip was 863 mm - nearly exactly the length of my slab of wood, and sounded good all over its register.
The first job, recorded for posterity in figure 2, was to cut out a tapering slab to define the width of the outside of the recorder I used a simple hand saw as it could make a thin and accurate cut. A band saw would be better. The second cut made the 5 mm thick lid over the same area. The last long cut defined the depth, not counting the lid, and also tapered. There remained plenty of wood of the correct width for the mouthpiece and the keys.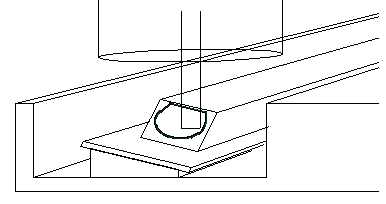
Figure 3: Setting up the router on my workbench. The recorder blank is screwed to a piece of old plywood, which is in turn bolted through the wedge to the bench to tilt the blank so that the vertical router bit cuts the slanted edge.
I ended with a solid recorder blank 863 mm long, 50 mm wide by 45 mm deep at the fipple end and 37 x 32 at the tip end. I used a 1400 mm long piece of old plywood as the support for the blank, screwing through the plywood into the edges of the recorder blank which would later be planed off. I planed the top surface of the blank where the lid would sit, and used a sharp spike to draw on to the two ends of the blank the shape drawn thick in figure 1, scaled to the radius 19 mm at the fipple end and 12.5 mm radius at the tip end.
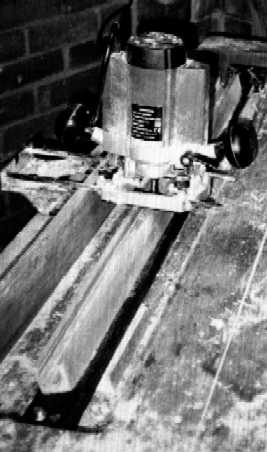
Figure 4 The router at work
I used the router by making it traverse an unchanging straight path, and using wedge-shaped pieces of waste wood to hold the work piece at the right position and angle so that the cutter took the required path. My father's old bench had a tool recess beneath its working surface, and I used the outside of this to provide the defining straight edge, which the router edge guide would slide along as shown in figure 4. Simple 20 degree wedges provided the necessary angles and a threaded rod through an oval hole provided the lateral adjustment. I used a mirror to peer down the two ends of the recorder blank to adjust the cutter to line up on my pencil marks at each end. Of course this point is best approached in slow steps roughing out the wood some way from the pencil line first. Having completed the two sloping sides to the bore, and roughed out its base as shown on figure 3, the semi-circular cross section was quickly finished off with a 7mm rounded blade chisel. Plenty of sandpaper was used to finish off the bore.
The "lid" was then planed down on both sides to its final thickness of 3 mm and sandpapered smooth so that is made a good fit with the bore. I then screwed it onto the bore with countersunk brass screws.
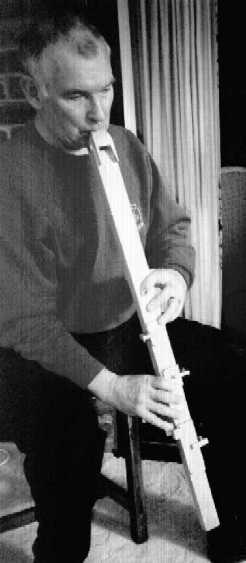
Figure 5: The playing position.
Screwed together, the recorder bore and lid
are much more robust and the outside of the bore can be planed off. I made a
6-sided shape giving a flat bottom which sits nicely on the thumb later.
Deciding how much to plane off is a compromise between strength and weight. I
left a wall-thickness as little as 3 mm on the sides. This gave a total
recorder weight of only 460 grams! Now is a good time to
sharpen your best 25mm flat chisel, have a cup of tea so that you are fresh and
relaxed, and prepare to cut the fipple from your planed lid. There is room for
an edge 25 mm wide. I defined the angled edges with two sawcuts, cut out the
wedge with the chisel, and severed the sharp end with a blow on my chisel. It
took only 10 minutes. Figure 6: The plan (right) elevation(left) and end sections (top and bottom). At the top
are the mouthpiece plans and elevations The wind pipe
aperture needs to be about 1 mm deep and 25 mm across to match the fipple, and
at least 15 mm long. I made it from two flat pieces screwed together. The lower
piece contained the entire 1 mm grove so that when you peered through the blowing
aperture you could see the fipple edge nicely framed near the top of the
aperture. A third flat piece covered the fipple end of the recorder. The
windpipe can be widened out to blow directly as in the figure, or you can
make the fipple on the lower surface. Do not blow into your completed mouthpiece and
bore just yet! It will depress you. The next job is to buy some kitchen sealant,
undo all the screws, and place sealant along all the surfaces that should be airtight.
PVA wood glue would do the job, but the sealant allows the pieces to be
prized apart for the inevitable adjustments. My recorder then sounded a most
melliferous low F! The holes can now all be drilled. It is worth investing in a
proper wood drill with a central spike and giving a clean edge. The placing of
the holes on a flat lid is a bit of a problem. I used the width of the lid to
help the holes fit my fingers. I made the keys out of 3 mm thick flat wood from
the left-over timber. The tiny hinges and screws were difficult to buy in DIY
stores but easy in a little old-fashioned ironmonger in Burnham on Sea! I found
three quality coil springs in an old gramophone turntable. The pads need to be
adjusted so that they sit exactly parallel to the hole apertures beneath them.
For the pad surface, some fine leather proved less good than an old bicycle
inner tube, which in turn was less good than some softer plastic rubbery foam
material. I cannot say that the end result is as good as that of the best round
bass recorders, but in playing you soon get used to the positioning of the fingers.
The playing position in figure 5
shows the fingers on the corners of the two central keys, where they give the
most leaverage. The bottom F key needed an extension piece for my little finger
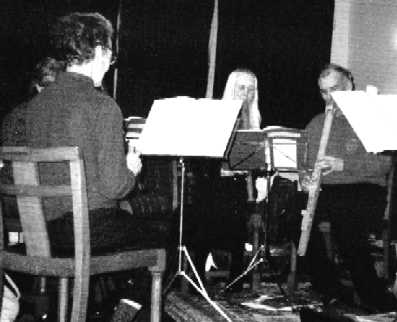
beneath the surface of the lid. Figure7: Playing with the Wantage recorder group within a few weeks of starting
construction Tuning is patience! A
piece of sandpaper wrapped round a pencil will widen the holes gently. I
started at the bottom of the register and moved upwards using my ear and an
electronic organ. £20 will buy an electronic tuner. I varnished and sandpapered
the wood both inside and outside, several times!
After all the thinking and drawing, the construction job took only a few working days.
It seemed much easier than making its wooden case.
Appendix:
The mathematics between round and square
h = r { cot f - [ cot2f + (f - p /2)/sin f + cos f ] 1/2 }
h has the value 0.5302 for f =20 degrees.
Copyright 2004 Colin Windsor : Last updated 5/10/2004